Sunday, December 6, 2015

New Reel

Finally created my first reel and I have to say I'm pretty excited about it. Although there's not much on it now, I'm looking forward to the coming months... I have a feeling I will be updating things a lot from this point on.

Rigging Reel 2015 from Bryan Godoy on Vimeo.


At the beginning of my time at AAU I was pretty certain I would end up pursuing animation but now that I've have this up, I'm definitely 100% sure I'm in the right discipline. Looks like I'm going to have to find a new name for my blog haha...

Monday, July 27, 2015

New Tool In The Works

I'm really excited about this one. I wrote it in PyMel and this was my first go at using Python in a true object-oriented fashion. Prior to this script I've been writing all my tools using maya.cmds so it feels good to finally jump away from a procedural approach and work in more of a "pythonic" format. For now I'm just posting an image of the interface for my new script but once I have a few days to check for bugs, I'll provide a link to download this thing.


Right now the most interesting thing I'll say about the tool itself, is it allows you to create an "EZ Selection" (which is a specified list of verts, edges, or faces saved to memory). What makes this little tool so powerful is it allows you essentially do away with selection sets (or the like) and you can literally deselect any number of components, do some other work, and still come back to your "EZ Selection" any point during your session.

I got the idea for this script while working on a rig (painting weights, vert by vert) and after creating dozens of selection sets I decided there had to be a more efficient way to work. Though it doesn't seem like it, what I discovered is, once you start adding a bunch of selection sets to your scene, Maya can start slowing down pretty significantly. Especially when you have to deal with thousands of verts and are working tediously to get your weights painted just right, a tool like this can come in handy rather quickly. It not only saves time—it keeps your scene light and saves your brain from getting fried.

Monday, July 13, 2015

Force Deformation Order

The other day I ran into a seemingly simple problem. I was trying to add a new blendshape to my rig but for some reason I wasn't able to get some verts to behave properly. To make a long story short, I wrote this:

(Shelf Button)
 

If you're like me and ever ran into this issue, you might have noticed that Maya's input window doesn't always solve the problem like you might expect. This tool is meant to provide an alternative. 
At the moment I'm still testing things out with just about every rig I can find to see if I run across any bugs. Currently the only deformers this tool supports are tweaks, blendshapes, and skinClusters (since that's all I needed at the time) but I plan on adding more features if it makes creating blendshapes and reordering deformers overall, easier.

If anyone's interested in looking at the code or using the tool yourself, below is the script written in Python. To throw this thing on your shelf you can use the following three lines. Let me know if this tool becomes of use to anyone and any comments or suggestions would be great too!

Download the script here:
http://bit.ly/1I315zV


# =====================================
# Force Deformation Order - BETA v.1.0
# =====================================

import maya.cmds as mc

# ==============
# Window
# ==============

# If window already exists, it will be replaced by new window
FDOName = "forceDOrder_UI"
if mc.window("forceDOrder_UI", exists=True):
    mc.deleteUI("forceDOrder_UI", window=True)

def FDO_UI():
    # QuiCam UI
    FDOWin = mc.window(FDOName, title="Force Deformation Order", menuBar=True)
    parentLayout = mc.columnLayout(adj=True)
    instructionMenu = mc.menu(label="Instructions")
    mc.menuItem(label="Open Instruction Window", parent=instructionMenu, command="forceDeformationOrder.instructionsWindow()")
    mc.setParent("..")
    mc.separator(parent=parentLayout, height=10, style="in")
    mc.button(parent=parentLayout, label="Load List", width=100, height=30, command="forceDeformationOrder.loadList()")
    mc.separator(parent=parentLayout, height=10, style="in")
    childLayout = mc.rowLayout(parent=parentLayout, numberOfColumns=2, adjustableColumn=True)
    mc.textScrollList("textBox")
    mc.columnLayout(parent=childLayout, adj=True)
    mc.button(label="Move Up", width=100, height=40, command="forceDeformationOrder.moveUp()")
    mc.button(label="Move Down", width=100, height=40, command="forceDeformationOrder.moveDown()")
    mc.columnLayout(parent=parentLayout, adj=True)
    mc.separator(height=10, style="in")
    mc.button(label="Remove All", width=100, height=30, command="forceDeformationOrder.removeAllList()")
    mc.separator(height=10, style="in")
    mc.separator(height=10, style="in")
    mc.button(label="Force Deformation Order", width=100, height=30, backgroundColor=[1, 0.2, 0.2], command="forceDeformationOrder.forceOrder()")
    mc.showWindow(FDOWin)

# Instructions Window
def instructionsWindow():
    # If window already exists, it will be replaced by new window
    instructionsName = "instructWin_UI"
    if mc.window("instructWin_UI", exists=True):
        mc.deleteUI("instructWin_UI", window=True)
        
    # Instructions
    instructionsWin = mc.window(instructionsName, title=" FDO - Instructions")
    mc.columnLayout(adj=True, width=500)
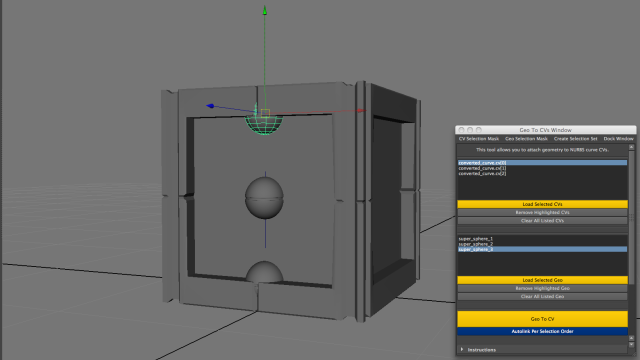
    mc.text(wordWrap=True, al="center", label="1.) Select one piece of geometry to rearrange your object's deformation order.")
    mc.text(wordWrap=True, al="center", label="2.) When you have made your selection, load your list and specify the order of your inputs.")
    mc.text(wordWrap=True, al="center", label="3.) Once you are satisfied with the order of your list, click 'Force Deformation Order'.")
    mc.text(wordWrap=True, al="center", font="boldLabelFont", label="Note: Make sure your geometry is selected before running any commands.")
    mc.separator(height=10, style="in")
    mc.separator(height=10, style="in")
    mc.text(wordWrap=True, al="center", font="boldLabelFont", backgroundColor=[0.8, 0.35, 0.35], label="Suggestions or Comments - http://b-animated.blogspot.com/")
    mc.showWindow(instructionsWin)

# ==========
# Commands
# ==========

# Load List
def loadList():
    # Store geo variable for selection...
    selectedGeo = mc.ls(sl=True)
    
    # Query geometry - obtain deformer inputs
    queryGeo = mc.deformer(query=True, geometry=True)
    for i in queryGeo:
        geoShape = i
    listDeforms = mc.listSets(type=2, object=geoShape)
    mc.select(listDeforms, replace=True, noExpand=True) # needs 'noExpand' for sets
    
    masterList = []
    
    # Check for "skinCluster" nodes... 
    for everySkin in listDeforms:
        listConnects = mc.listConnections(everySkin, type="skinCluster")
        masterList.append(listConnects)
    
    # Check for "blendShape" nodes...
    for everyBS in listDeforms:
        listConnects = mc.listConnections(everyBS, type="blendShape")
        masterList.append(listConnects)
    
    # Check for "tweak" nodes...
    for everyTweak in listDeforms:
        listConnects = mc.listConnections(everyTweak, type="tweak")
        masterList.append(listConnects)
    
    # Delete "None" objects..
    for everyNone in masterList:
        masterList.remove(None) # ... run twice to make sure
        masterList.remove(None)

    # Add to list
    mc.textScrollList("textBox", query=True, allItems=True)
    for everyInput in masterList: 
        mc.textScrollList("textBox", edit=True, append=everyInput)
    listCount = len(masterList)
    mc.select(selectedGeo, replace=True) # select geo before spitting warning
    mc.warning(listCount, " Deformer(s) Added To List.")

# Remove all from list
def removeAllList():
    mc.textScrollList("textBox", query=True, allItems=True) 
    mc.textScrollList("textBox", edit=True, removeAll=True)       
    mc.warning("All Items Removed From List.")

# List Control
def moveUp():
    # Set up index to move item up
    currentIndex = mc.textScrollList("textBox", query=True, selectIndexedItem=True) # current index
    selInt = currentIndex.pop() - 1 # pop 'list' out of brackets - now 'int'
    
    # Set up string to specify which item to move up
    selStr = mc.textScrollList("textBox", query=True, selectItem=True) # shape node for selected item
    moveItem = [selInt] + selStr # new list
    
    # Move item up
    mc.textScrollList("textBox", edit=True, appendPosition=moveItem) # ...requires one integer value and one string
        
    # Delete selected item to aviod duplicates
    removeDup = mc.textScrollList("textBox", query=True, selectIndexedItem=True) # produce index
    mc.textScrollList("textBox", edit=True, removeIndexedItem=removeDup) # remove duplicate from list
    mc.textScrollList("textBox", edit=True, selectIndexedItem=selInt) # select new list item
    
def moveDown():
    # Set up index to move item up
    currentIndex = mc.textScrollList("textBox", query=True, selectIndexedItem=True) # current index
    selInt = currentIndex.pop() + 2 # pop 'list' out of brackets - now 'int'
    
    # Set up string to specify which item to move up
    selStr = mc.textScrollList("textBox", query=True, selectItem=True) # shape node for selected item
    moveItem = [selInt] + selStr # new list
    
    # Move item up
    mc.textScrollList("textBox", edit=True, appendPosition=moveItem) # ...requires one integer value and one string
    
    # Delete selected item to aviod duplicates
    removeDup = mc.textScrollList("textBox", query=True, selectIndexedItem=True) # produce index
    mc.textScrollList("textBox", edit=True, removeIndexedItem=removeDup) # remove duplicate from list
    mc.textScrollList("textBox", edit=True, selectIndexedItem=selInt -1) # select new list item
    
# Force order based on list
def forceOrder():
    # Store geo variable for selection...
    selectedGeo = mc.ls(sl=True, long=True) # GEO (long name)
    
    # Compare new list to old defomation order
    listShapes = mc.textScrollList("textBox", query=True, allItems=True) # LIST
    
    # Convert shape nodes to transform nodes
    listAll = [] # empty list
    
    for everyItem in listShapes:
        wrapQuotes = everyItem.__str__() # wrap in quotes
        listAll.append(wrapQuotes) # toss everything into empty list
        
    # Slice itemsi in 'listAll' so we are only dealing with two items at a time (needed for reorderDeformers)
    splitTwo = -2 # set to -2 to set up sliceCount 
    
    for i in listAll:
        splitTwo += 1 # add 1 for every iteration
        sliceCount = listAll.__getslice__(splitTwo, splitTwo +2) # slice tuple     
        sliceTotal = len(sliceCount) # gather length
        
        if sliceTotal == 2: # if there are 2 values returned... move forward
            RDList = sliceCount.__getslice__(0,2) # isolate deformer's list - shape nodes   
            RDFinals = RDList[0], RDList[1], selectedGeo[0].__str__() # convert...
            
            # *** For every tuple, run reorderDeformers command ***
            RDMaster = map(str, RDFinals) # covert type tuple to list...
            mc.reorderDeformers(RDMaster[0], RDMaster[1], RDMaster[2]) # * REORDER DEFORMERS *
            # three values (Dform1, Dform2, geo affected) - Dform2 placed over 1
            
    # Once order has been changed, we'll reselect geo to refresh input list
    mc.select(clear=True)
    mc.select(selectedGeo, replace=True)
    mc.warning("Deformation Order has been rearranged.") # final warning
            
# Script by Bryan Godoy
# http://b-animated.blogspot.com/
# https://twitter.com/b_animates

Thursday, May 28, 2015

GeoToCVs

It's been a while but I finally developed another tool! This time around I wrote a script that will allow you to specify a list of control vertices and a list of polygonal objects, then you can attach each piece of geometry to each CV.

The cool thing is this script doesn't actually create any permanent connections so you can reposition your geometry at any point later on. Depending on the number of CVs you specify and the complexity of your scene you can use this tool in two ways:

1.) By "connecting" specific CVs to specific pieces of geometry (by highlighting one CV and one polygonal object, then clicking 'Geo To CV').

2.) Or by "autolinking" your geometry to all the CVs in your list (based on selection order).


So for instance, if you draw out a NURBS curve you can easily place one piece of geometry on each CV. Or, alternatively, you can:

a.) Take any polygonal object


b.) Convert its edges to curves

c.) Select CVs from those curves


d.) Make duplicates of certain pieces of geo


e.) And connect all the geo to each CV in worldspace


This is especially powerful when you want to make use of lots of duplicate geometry using Duplicate Special and Instances. You can arrange everything in 3D space by "drawing out your points" using curves. Think of drawing curves for nHair but rather than using those CVs to shape Hair, you use your CVs to position geometry along your curves.

Below is an example of how I used this tool in an actual project. Prior to this step I created a mesh that would serve as a "base" for generating curves:


Of course, you can find lots more uses for GeoToCVs but in this case I created something more abstract since everything was going to be used as visuals for a VJ presentation. This tool would probably be great for motion graphics too.

Currently, I'm still finishing up this project but I rendered a still to get an idea of what the final might look like.


I think this goes to show you, a little python goes a long way—even when you initially write a tool for a very specific purpose. Who knows how else I'll end up using GeoToCVs though if anyone's interested in the tool themselves, here's a link to the code for your own project. If anyone finds another use for this or just creates something cool, let me know!

Thursday, January 22, 2015

3 New Scripts

I'm glad to say I've been pretty busy lately working on three new scripts for Maya!
  • Key All v.2 (for character animation)
  • animHelper  v.2 (for character animation)
  • EZ Align (for modeling, pivot manipulation)
As before, I'm thinking of making all these tools available to everyone. But, before I do, I'm thinking of recording at least one tutorial to make using these scripts as straightforward as possible.

The good news is I've finally put all three scripts through their paces so it won't be long before I get these tools online. Here's a few snapshot of the final interfaces.

Key All: Non-Expanded and Expanded Interface


animHelper: Individual Tabs for Each Tool


EZ Align: Short and Sweet


Tuesday, January 6, 2015

Key All v2

Finally had a chance to update my animation tool, Key All. Right now I'm still in the process of testing things but I should have something nice within a couple weeks (hopefully sooner). Before I release an update I want to do a little animating myself—that way I can see things from more of a user's perspective. The good news is once I feel everything is working well enough, I'll provide a link for download and of course the tool will remain free for anyone that want to try it out. Based on the first release, you guys really gave me some fresh input so I'm looking forward to hearing anymore suggestions. Anything that makes the tool more useful is always a good incentive for me :)

If anyone's curious, here's a preview of the interface. Version 2 now includes much more specific control (thanks Lana B - Teatime Anim) and even includes an "Override" tab that will allow the tool to behave the same way it did in version 1. Basically what the Override does is allow the user to create Keys on ALL of the attributes in the List, no matter what you specify in the Translation, Rotation, and Scale tabs. Override not only keeps animating straightforward and quick but it also gives you the option to Key every attribute in your Channel Box or just key specific Transformation values using the 3 other tabs.


Friday, January 2, 2015

DC Comic's Harley Quinn!


Well, sometimes you just got to start new. With that said, I decided to hold off on my last WIP and move on to a fresh new project. For now all I'm going to say is that this character is simply a mod of LWS's Clarie Rig and I'm excited to see what I end up doing… a dialogue piece might be fun. In the meantime, here's a quick pose I did to test things out.